Project management tool
At Midokura, we predominantly work with projects managed by Kubernetes. This approach offers significant advantages, allowing us to seamlessly run projects locally in a manner identical to their production environment. To achieve this we need:
- Creating a local cluster to emulate production environments.
- Running end-to-end tests on this cluster to ensure the robustness of our applications.
- Leveraging these tools within our CI workflows to create ephemeral environments for testing.
Our toolset includes Kind for running Kubernetes on laptops and Helm charts to manage deployment across various components on these clusters. Additionally, we rely on Docker to build application images. While manual setup of these tools is feasible, it often involves numerous steps prone to human error. To mitigate this, we automate these processes using tools that handle these operations effortlessly. This approach not only saves developers time but also reduces errors, as these tools are maintained centrally and easily reproducible.
These tools are widely adopted across projects, underscoring their value. By integrating them into our CI workflows, we can:
- Compile and test the project.
- Generate the docker images.
- Run the end-to-end test with the already-built images.
- Publish validated images to a repository.
All this article uses a spring project as an example.
Choosing Github Actions
At Midokura, GitHub Actions predominantly drives our workflow orchestration. While I’ve experimented with Jenkins, Travis, and Hudson in the past, my experience with them has been primarily limited to straightforward setups, devoid of intricate workflows. Despite initially finding these platforms daunting due to their learning curves, I eventually acclimated to their functionalities.
I’ve found that GitHub Actions offers a similar experience. However, my greater familiarity with GitHub Actions, stemming from its frequent use within our organization, makes it my preferred choice.
Choosing Gradle
In this article, I’ll demonstrate how Gradle and GitHub Actions can streamline the continuous integration and delivery of projects, focusing on a Spring project. I have always worked with Maven, I do know that Maven is versatile enough to handle the objectives of this article, but I want to force myself to use Gradle as I want to explore the differences of both tools.
After this exploration, I find that both Maven and Gradle are commendable options, each with its strengths. I do feel Maven works better out of the box, for instance, I did make a custom banner, and I want to add the version of the project in it. With Maven this would be as simple as adding the variable in the banner. But in Gradle, you need to add a step:
processResources {
    filesNotMatching("banner.txt") {
        expand(project.properties)
    }
}
And even after adding this step it does not work directly on the banner, you have to create a custom variable on the project properties and add that property to the banner. Is a completely silly thing, but with Maven it works out of surprises and with Gradle you need to look around to accomplish it.
On the other hand writing tasks with Gradle, is easier than making ant tasks for Maven, and works in a more similar way that a Spring developer is used to. Making tasks with Gradle is just to make classes and importing them, reaching out of the ugly XML Maven configurations.
Testing on every PR
Continuous integration (CI) entails automating the integration of code changes to ensure that none of the changes introduce errors in the codebase. The key to ensuring project correctness lies in thorough testing, and incorporating workflows that run tests before merging changes into production. Gradle offers commands for testing, with the execution of ./gradlew check encompassing JUnit tests and the Checkstyle plugin. GitHub Actions is seamlessly integrated to execute this process on every pull request, ensuring that contributions to the main branch are always production-ready.
Here is the corresponding YAML configuration:
name: PR validation
on:
  pull_request: null
  workflow_dispatch: null
jobs:
  validate-project:
    runs-on: ubuntu-latest
    steps:
      - name: Checkout project sources
        uses: actions/checkout@v3
      - name: Set up java
        uses: actions/setup-java@v4
        with:
          java-version: 21
      - name: Setup Gradle
        uses: gradle/gradle-build-action@v2
      - name: Test project
        run: ./gradlew check
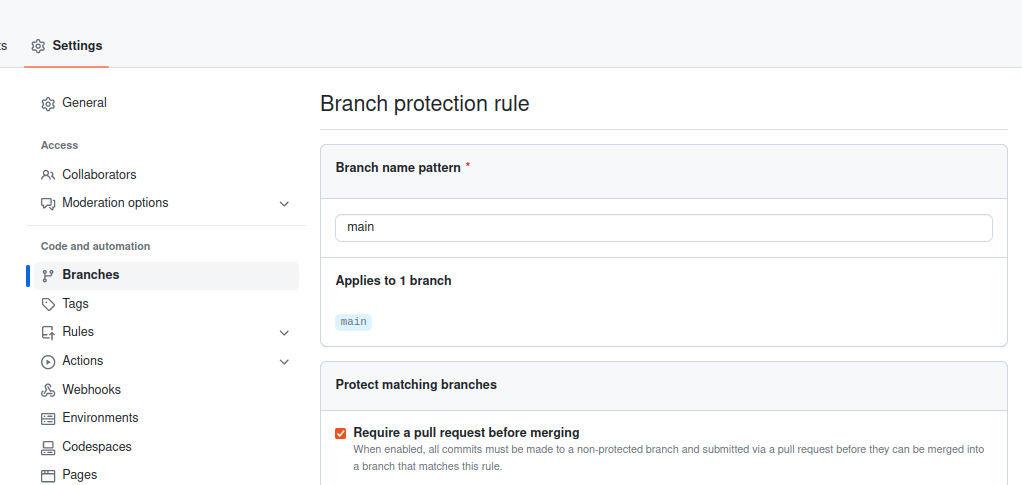
You can configure the main branch as protected in the GitHub repository settings, ensuring that all changes to the main branch derive from discussions within your team via pull requests.
Additionally, you can enforce certain workflows to be valid before merging the PR, ensuring the stability of the main branch.

Generating Docker Image on Each Merge to Main
Continuous delivery (CD) involves a software development practice where software can be released to production at any given time, with the key aspect being the creation of artifacts that undergo thorough validation.In our example, tailored for Kubernetes, managed artifacts take the form of Docker images. The process of ensuring its correctness involves using these images to conduct end-to-end tests, a part excluded from this article. Here, we focus on generating the Docker image each time we merge to the main branch, with the images stored in the GitHub Container Registry. Spring Boot utilizes buildpack to create the Docker image, with buildpacks leveraging the Liberica JVM. We conduct tests using the same distribution as the one used in the production image.
Here is the corresponding YAML configuration:
name: Docker Image Builder
on:
  push:
    branches:
      - 'main'
jobs:
  push-image:
    runs-on: ubuntu-latest
    steps:
      - name: Checkout project sources
        uses: actions/checkout@v3
      - name: Set up java
        uses: actions/setup-java@v4
        with:
          distribution: 'liberica' # Default buildpack distribution
          java-version: 21
      - name: Setup Gradle
        uses: gradle/gradle-build-action@v2
      - name: Login to GitHub Container Registry
        uses: docker/login-action@v3
        with:
          registry: ghcr.io
          username: ${{ github.actor }}
          password: ${{ secrets.GITHUB_TOKEN }}
      - name: Push Image to ghcr.io
        run: ./gradlew check bootPushImage
In the absence of a dedicated plugin for pushing the image, a custom task is created to effectively handle this process. As seen in the code snippet, we execute the Docker build command within this task.
import org.gradle.api.DefaultTask
import org.gradle.api.provider.Property
import org.gradle.api.tasks.Input
import org.gradle.api.tasks.TaskAction

abstract class DockerPushTask extends DefaultTask{
    @Input
    abstract Property<String> getImageName()

    DockerPushTask(){
        imageName.convention("ghcr.io/fraucamidokura/task-sample:${project.version}")
    }
    @TaskAction
    void push(){
        println "Will push to ghcr "+imageName.get()
        project.exec {
            commandLine "docker", "push", "${imageName.get()}"
        }
    }
}
You will need to declare the task in the Gradle file.
tasks.register("bootPushImage", DockerPushTask){
    group = "build"
    description = "Upload your image to the loged docker registry. You must be loged in docker to call this task"
    imageName = bootBuildImage.imageName.get()
    dependsOn(bootBuildImage)
}
We are making this task dependent on the bootBuildImage task. This task is added by the Springboot Gradle plugin, and it also depends on a check. Therefore every time we run the bootPushImage we are also running the tests.
Publish the Docker image on each merge to main
On SaaS projects where we have a single deployment, the best strategy is to deploy every commit to production. In this type of product, generating a release does not hold much value. However, for projects such as Android applications where not all users will work with the same version, the release process could add more value.
The provided example accommodates both scenarios, but it’s easy to tailor it for a specific preference. The chosen workflow triggers the release manually, utilizing the ResearchGate Gradle Release plugin. This plugin eliminates the “SNAPSHOT”, creates a tag, and has been customized in the code to upload the image with the current version.
name: Release sample app
on: workflow_dispatch
jobs:
  release:
    runs-on: ubuntu-latest
    steps:
      - name: Checkout project sources
        uses: actions/checkout@v3
        with:
          token:  ${{ secrets.PUSH_FRAUCA_TOKEN }}
      - name: Set up java
        uses: actions/setup-java@v4
        with:
          distribution: 'liberica' # Default buildpack distribution
          java-version: 21
      - name: Setup Gradle
        uses: gradle/gradle-build-action@v2
      - name: Login to GitHub Container Registry
        uses: docker/login-action@v3
        with:
          registry: ghcr.io
          username: ${{ github.actor }}
          password: ${{ secrets.GITHUB_TOKEN }}
      - name: set git config
        run: |
          git config --global user.email "fraucamidokura@noreply.com"
          git config --global user.name "fraucamidokura"
          git config -l
      - name: Make new release
        run: ./gradlew release -Prelease.useAutomaticVersion=true
Gradle will also help with onboarding process
The example provided illustrates a simple yet effective approach to generate part of the necessary workflow for continuous integration and continuous delivery. We push a Docker image that undergoes testing via pull requests and before the merge to the main branch. While there’s still work ahead, such as demonstrating how to conduct end-to-end tests on this image, I aim to cover these topics in future articles.
I’ve used Gradle to orchestrate all these tasks, believing it to be an excellent choice that can scale with the project’s needs. For projects running a SaaS application with a mono-repository, Gradle proves to be a great option. By leveraging widely-known tools like Maven and Gradle, teams can tap into extensive references, documentation, articles, and bug resolutions, simplifying the onboarding process. Given that most Java developers are already familiar with Gradle, they will likely be acquainted with most commands, requiring only a basic understanding of the custom additions implemented in the project. Even newcomers with limited experience in Spring Boot projects can readily access references and documentation, eliminating the need for additional custom documentation.
Embracing established tools such as Gradle reduces the effort required to manage the project, making it less daunting for experienced developers and offering high-quality documentation for those less experienced.